Ansmann Racing Mad Rat Front Suspension 3D Printable Arm - .stl .igs .stp CATIA .model
Ansmann Racing Mad Rat Vorderachse Querlenker für 3D-Drucker
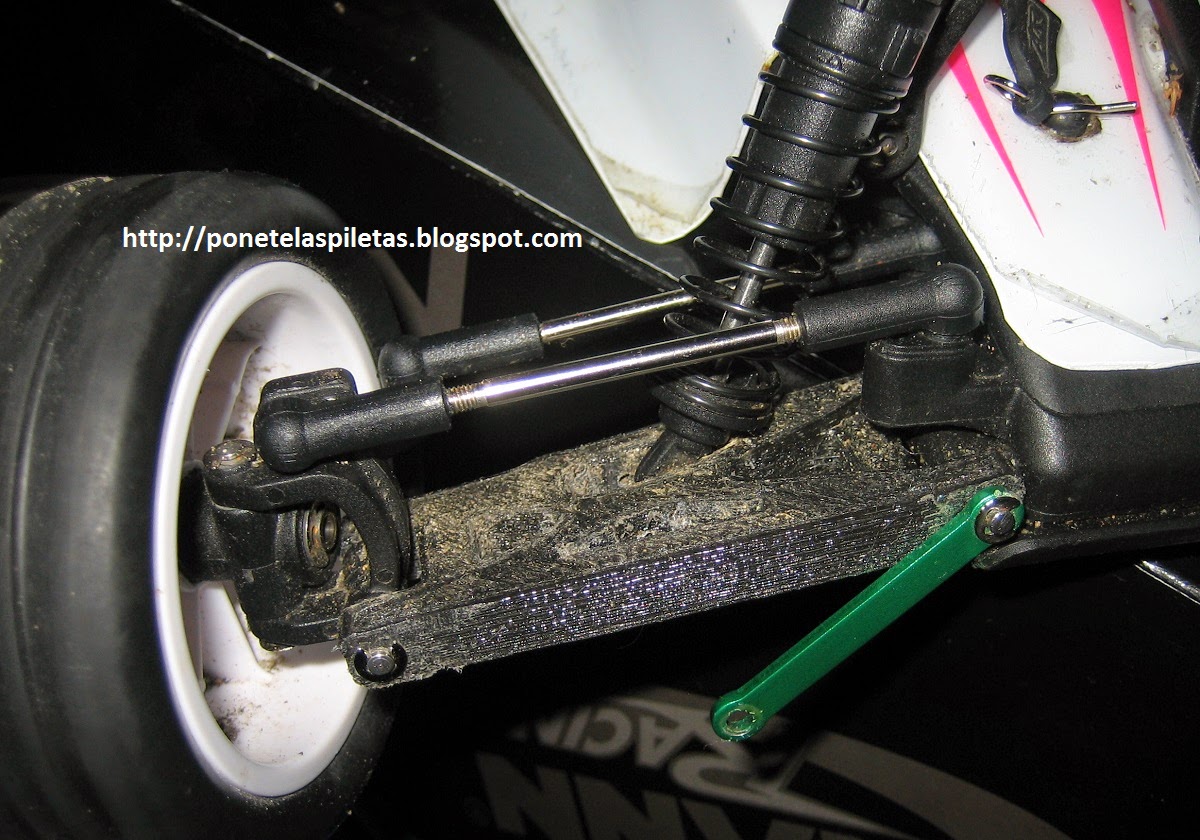
This is my reinforced version of the front suspension arm for the Ansmann Racing Mad Rat RC car.
I designed it taking the main dimensions from the original, but adding
some thickness and material in those areas that shown to be weak to me
(I broke a couple of the original ones in some hard jumps).
This design is a right-hand fully printable version. If you need the
left hand, you just need to mirror this model in your printer sofware or
your CAD.
Integrated FPV system with 7" LCD screen and 3D-printed frame - 1st delivery
Hace ya un tiempo que compre los componentes para poder montar un FPV con los aeromodelos que tengo, o un hipotético renacimiento del quadcopter en el futuro, pero por falta de tiempo, otros proyectos y la falta de una pantalla o unas gafas FPV (googles) había dejado el proyecto en stand-by hasta ahora.
It's been a while that I've bought some components for building up my FPV system to be mounted in my planes or a future re-born of the quadcopter but due to a lack of time, other projects and the missing screen or googles to view the transmission the project was in stand-by.
El problema era que no estaba seguro de invertir 300€ en los googles sin tener claro si luego realmente les iba a sacar partido, así que me decidí por comprar una pantalla LCD de 7" en ebay que me costó menos de 40€ incluyendo la placa controladora con entrada para AV, VGA y HDMI.
As I was not sure if investing almost 300€ in the googles was going to make sense, I just decided to go for a 7" LCD screen that I've bougth in ebay for less than 40€, including the controller board (with AV, VGA and HDMI inputs).
Pero lo siguiente era poner todos los componentes juntos, así que diseñé un pequeño marco para imprimirlo con la impresora 3D que me sirviera para acomodar los componentes de una manera compacta, y en un futuro tal vez poder montar el conjunto sobre la radio RC o en un trípode.
But now I needed to put everything together, so I designed a 3D-printed frame to arrange the componentes with the idea of keeping the system compact (and maybe later on mount this directly on top of the RC radio).
GoPro Hero 3 mount for Axial Dingo
Se trata de un soporte para la cámara GoPro Hero3 para poder montarla arriba del crawler Axial Dingo, mas precisamente en la barra antivuelco, aunque también puede usarse para otras aplicaciones.
This is a very
simple mount for the GoPro Hero 3 camera designed to be position in the
Axial Dingo roll cage, but it can also be used in other applications.
Very detailed 3D CAD Playmobil model
He creado este modelo 3D de un playmobil tomando las dimensiones con un calibre de un muñeco real. El modelo ha sido creado en CATIA v5 R21 y subido a GrabCAD y Thingiverse, donde también se pueden encontrar otros formatos (.stp, .igs, .model, .stl).
I've created this Playmobil model taking the dimensions with a caliper from a real playmobil toy. The model has been created using CATIA v5 R21 and uploaded to GrabCAD and Thingiverse, where you can also find other file formats (.stp, .igs, .model, .stl).
PRUSA i3 by diegudio - 3D CATIA Model
Finalmente me hice de tiempo para continuar con el modelo 3D de mi version de la impresora reprap tipo PRUSA i3.
I've finally got some time to continue with the 3D modelling of my version of the PRUSA i3 printer.
Mas fotos y links a los archivos después del salto.
More pictures and links to the files inside.
prusa i3 frame dimensions and CATIA 3D model for DIY
He subido a thingiverse un drawing con las dimensiones del marco de la prusa i3 para aquellos que prefieran fabricarlo en vez de comprarlo. También podrán encontrar en el link un modelo CATIA v5R18 3D (CATPart) y su conversión a .igs y .stp.
I uploaded to thingiverse a drawing with the dimensions of the prusa i3 frame for those of you who prefer to do it yourself, including also a CATIA v5R18 3D model (CATPart) and some .igs and .stp files.
Los datos después del salto // The link after the jump


.jpg)
.jpg)
