Pages

Sunday 27 January 2013

DIEGUDIOS - Impresora 3D RepStrap - 3ra entrega

DIEGUDIOS - Impresora 3D RepStrap - 3ra entrega

Tengo pocas ganas de escribir, así que mejor les dejo las fotos que valen mas que cualquier palabra... Solo comentar que voy comprando las cosas poco a poco y en los ratos libres que tengo voy avanzando con la fabricación de la estructura.
I'm too tired to write today, so I'd rather leave you some pictures that are better than any word... Just to comment that I'm receiving the parts and components and I'm moving forward with the manufacture of the frame.

Cuando termine todas las compras voy a poner un listado de las tiendas y vendedores de ebay donde he comprado las cosas, como así también los precios y comentar dónde se puede ahorrar mas, ya que el costo final puede ser incluso mas barato de lo que yo voy gastando.
As soon as I finish receiving all the components, I'm sharing the list of the stores and sellers, prices and also give you some hints of where you can save some money, because I'm noticing that the whole cost can be even cheaper than what I'm expending so far.


Monday 14 January 2013

DATOS ALINEACION PARALELO VW SHARAN / SEAT ALHAMBRA 7N

ALIGNMENT DATA VW SHARAN 7N / SEAT ALHAMBRA 2.0 TDI 140CV

STURZMITTELUNG UND NACHLAUFEINSTELLUNG VW SHARAN 7N / SEAT ALHAMBRA


Source: http://www.wrangler4you.com/


keywords: paralelo alineación alignement suspension sharan alhambra 7N messprotokoll volkswagen seat serienfahrwerk hinterachse vorderachse tren delantero tren trasero front axle rear axle sturz caida camber spur convergence toe convergencia caster nachlauf incidencia einzelspur spreizung gesamtspur

Sunday 13 January 2013

DIEGUDIOS - Impresora 3D RepStrap - 2da entrega

DIEGUDIOS 3D RepStrap printer - 2nd delivery

¿RepRap o RepStrap? Me he dado cuenta luego de informarme mejor que mi impresora queda mejor encuadrada como una RepStrap que una RepRap, ya que va a estar fabricada con muchas piezas que ya dispongo, que he comprado en ferreterías locales o por internet, y que no se trata de un diseño duplicado usando piezas duplicadas (RepRap).
RepRap or RepStrap? I've figured out that my future printer is more a RepStrap than a RepRap, as I'm using whatever things that I'm finding in between my stuff, in local warehouses and in internet ("straps") and not using a duplicated design (RepRap).

La versión del diseño que les he mostrado en la 1ra entrega ya ha cambiado dado que el proyecto evoluciona. Originalmente había pensado en las guías IGUS DryLin W para los carros deslizantes, pero revisando el sitio de IGUS encontré las DryLin N, que son algo mas baratas y además por menos precio puedo pedir una guía mas ancha (80mm de carro en vez de 40mm). Suponiendo que la rigidez de la guía es similar (aunque esto no es del todo cierto), el carro de 80mm de pisada debería mejorar la rigidez del carro transversal, al otorgarle mayor ancho de soporte.
The version shown in my last post have changed, as the project evolves. Originally I decided to use IGUS DryLin W guides, but checking IGUS website I've found the DryLin N guides, that are a little bit cheaper, and for less price I get a wider guide (80mm instead of 40mm). Supposing that the rigidity of the skid-guide package is similar, the 80mm width should help to get a stiffer Y and X sliding carts.


IGUS  DRYLIN W
 

IGUS  DRYLIN N


El resto de la configuración se mantiene igual, salvo que he rotado una de las correas para simplificar el montaje. Les dejo las imágenes del nuevo diseño.
The rest of the configuration remains the same, except of one of the belts that I turned 90º to simplify the assembly. I leave you here some pictures of the new design.


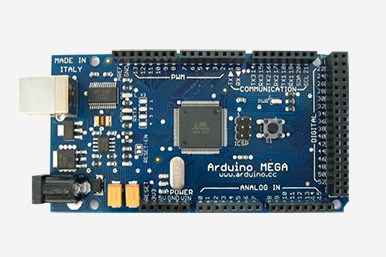
Finalmente comentar que ya he definido también la electrónica: utilizaré un sistema RAMPS 1.4 para poder montarlo sobre mi Arduino Mega que ya tenía en casa. El RAMPS es una especie de interface que simplifica la conexión de los controladores de los motores paso a paso con el Arduino. Los controladores elegidos son tipo Polulu, con chip A4988 que tiene corte por sobre corriente para auto-protegerse. Toda la información necesaria de estos equipos la pueden encontrar en http://www.reprap.org
Finally I would like to comment that I've defined also the electronics: I will use a RAMPS 1.4 system so I can use my Arduino Mega that I have at home. The RAMPS is a kind of interface that simplifies the connection between the Arduino and the stepper-motor controllers. And talking about the controllers, I will use 4 controllers similar to Polulu type, using the A4988 chip that includes a over-current shut-off for auto-protection. All the necessary info about these systems you can find it at http://www.reprap.org

 ARDUINO MEGA

RAMPS 1.4

ARDUINO + RAMPS + MOTOR CONTROLLERS


Tuesday 8 January 2013

DIEGUDIOS - Impresora 3D reprap - 1ra entrega

DIEGUDIOS reprap 3D printer - 1st delivery

He estado pensando en hacerme mi propio mini centro de mecanizado por control numérico (CNC) desde hace mucho tiempo, pero por cuestiones de falta de espacio, ruido y suciedad generadas ha sido un proyecto que siempre ha estado en stand-by... hasta que he descubierto el mundo de las RepRap y la posibilidad de hacerme mi propia impresora 3D y el sueño del CNC ha recobrado vida.
I've been thinking in having my own CNC almost since the beginning of time, but due to space, noise and dirt reasons I keep it in stand by for the future... until I discovered the RepRap world and the possibility of having my own DIY printer and the dream of CNC came back again.

Por un lado pensaba "vete a lo seguro, compra un kit" y por otro pensaba "no, tenés que hacertelo vos mismo"... y como se pueden imaginar, la batalla la ganó el "hazlo tu mismo" así que aquí estoy presentando mi propio diseño de RepRap que he dado a llamar "diegudios_printer".
One part of me was saying "go for the safe, buy a kit", and the other said "no man, do-it-yourself"... as you can imagine, the DIY won the battle and here I'm presenting my own design called "diegudios_printer".

...y si, todavía se trata de un diseño pero la idea general está ahí, y tiene como filosofía principal encontrar un concepto robusto y sencillo con la menor inversión posible.
... and yes, it's still a design, but the general idea of the printer is there, and it's 100% oriented to finding a strong, robust frame with the less money investment possible.


Como pueden ver en las imágenes de mas abado, el diseño es similar a las máquinas de CNC caseras. No tengo ni idea si hay una versión oficial RepRap de esta configuración, pero si no lo hay, tal vez esté creando uno ahora mismo.
As you can see in the pictures, the design is more similar to those of the home-made CNC machines. I don't know if there is an "official" RepRap name to this kind of configuration. In case not, maybe I´m creating a new now.


Algunas características:
Some characteristics:
 

- La estructura (o cuadro) está formado por una L con dos tacos de madera de 80x80mm de sección.
- The frame is based in a L-shape done with (probably) two pieces of 80x80 wood.

- La mesa de impresión (calefactada) se desplaza en los ejes X e Y (plano horizontal)
- The support bed (heated) is sliding in X & Y direction (horizontal plane)

- El cabezal de impresión (hotend) se ubica en el brazo deslizante en el eje Z, cuya guía se aloja a su vez en el poste vertical de la L del cuadro.
- The hotend will be located in the Z-sliding-arm, that will slide along the vertical part of the L-frame.


- La idea es dejar el extruder (alimentador de filamento) fijo, tal como se hace en los modelos Rostock, y solamente alojar el cabezal en el brazo Z.
- The extruder will be fixed (as in Rokstock configuration) - only the hotend will move.


- El movimiento de los carros X e Y se realiza a través de correa dentada T2.5. La transmisión de movimiento en el eje Z se realiza con un eje roscado (M6 o M8, a definir).
- X & Y transmission is done with T2.5 belts, Z transmission is done by threaded shaft (M6 or M8)


- Los 3 carros deslizan sobre guias tipo DryLin W de doble raíl de la marca IGUS, con patines sintéticos sin necesidad de lubricación.
- All 3 axis sliding devices are IGUS DryLin® W double-rail, with non-lubricated skids.


La idea de usar esta configuración es reducir las "masas suspendidas"... en otras palabras, desplazando la mesa de impresión tanto en X como en Y reduzco los componentes que de otra manera deberían izarse en el eje Z. Así pues, en el eje Z solo desplazo el cabezal de impresión, reduciendo el momento flector del brazo Z y por tanto la complejidad, al necesitar un carro Z menos rígido que otras configuraciones.
The idea of using this configuration is to reduce the "suspended masses" --> By moving the bed in X & Y at the same time, I reduce the components that are moved in the Z direction. Even more, with the fixed position of the extruder, the only mass moved in Z is the hotend, reducing bending of the Z-sliding-arm.


La rigidez de la mesa de impresión cuando se desplaza fuera del plano Z-Y (flotando en dirección X) se garantiza a través de la propia guia IGUS y además de una base que hace de soporte (madera de 10mm de espesor).
The stiffness of the bed when displaced outwards the frame (Y direction) is guarantee by the igus rail, which is an aluminium profile and gives extra-strength to the 10mm-thick-wooden base in which it's located. 

Los raíles y los patines son relativamente económicos y fáciles de mantener, y a priori creo que van a ayudar a proveer una buena rigidez para las masas suspendidas (motor del sistema de desplazamiento transversal, o eje X).
The rails and the skids are quite cheap, easy to mantain and (I guess) they will provide a good strength for the suspended masses (X-transmission motor). 

Dado que la velocidad de desplazamiento en Z no es prioritario (solo se avanza lentamente y pocas veces comparado con los desplazamientos en X e Y) he decidido utilizar un eje roscado para realizar la transmisión y de esta manera lograr también tener mayor precisión y al mismo tiempo reducir costos al no precisar correas, poleas y rodamientos. Incluso no necesito ningún tipo de alineación entre el eje roscado, el carro y el motor ya que el guiado del carro se garantiza por las guias IGUS, así que el eje roscado puede tener cierta desalineación.
As the speed in Z direction is not a priority, I decided to use a threaded shaft for the displacement instead of the belt, so I can get a better precission, and at the same time I reduce the total price by saving in belts, belt pulley and bearings. I don't need to "align" the threaded shaft because the Z-sliding-arm is aligned by the igus profile.

Además, mi configuración solo necesita 4 motores (en vez de los 5 típicos de una Prusa Mendel) ahorrando también costos en esto.
In addition, my configuration has the advantage of using 4 stepper motors instead of 5,(as in a Prusa Mendel) saving some money there.

Por supuesto, solo sabré si todas estas suposiciones son ciertas cuando ponga la impresora a trabajar...
Of course, I won't see if all this assuptions are true until I put this to work... 

El paso siguiente será definir la electrónica (tengo una Arduino Mega en casa, así que trataré de buscar algo que la aproveche y así ahorrarme unos euros mas).
The next step is to define the electronics (I have an Arduino board at home, so I'll find a configuration to use the arduino and save some more money)...

Por supuesto, si la configuración funciona, compartiré la experiencia y el diseño (incluyendo el modelo 3D para quien lo quiera).
Finally, if this works, I'm open to share my design (including the 3D model) to whoever is interested.


Monday 7 January 2013

QUADCOPTER - Entrega final

QUADCOPTER - Final delivery

Se podría decir que mi historia con los quadcopters tiene un final agridulce.
I can say that my story with quadcopters has a bittersweet end.

Desde el punto de vista técnico, he sido capaz de diseñar y construir dos quads differentes, usando dos configuraciones (+ & x), dos materiales principales diversos para el cuadro (madera y aluminio), he podido probar dos placas controladoras (HK v1.1 y HK KK2.0), actualizar el firmware de las controladoras, aprendí cómo setear los ESC con el recorrido del stick de la radio e investigar respuestas de vuelo usando 4 medidas diferentes de hélices (6", 8", 10" y 12"). Más aún, he podido resolver problemas de estabilidad (causados por la mala configuración de los ESC) y he conseguido al final un quad bastante estable. Todo esto puede considerarse la parte "feliz" de la historia.
From the technical point of view, I was able to design and build two quads in two different configurations (+ & x), using two different basic materials (wood & aluminium profiles), try two different controllers (HK v1.1 and HK KK2.0), introduce new firmware to the controllers, lern to adjust the ESC and investigate flight behaviors using 4 different propeller sizes (6", 8", 10" and 12"). Even more, I solve stability problems (due to the ESCs not properly regulated), and I was able to get a pretty stable quad at the very end of the process. This can be considered the sweet part of the story.

La parte no tan felíz, o mas bien "amarga" comienza con mi último vuelo realizado, que puede pasar a convertirse en mi "último" vuelo. Una vez conseguido un buen quad, estable y manejable, sale a la superficie el hecho de que soy muy malo volando estos bichos endemoniados. No he sido capaz de realizar un vuelo normalito, y casi que pierdo el quad, debiendo de cortar motor con el quad como a 30m de altura porque sino lo perdía de vista, con la consequente caída en picada y el aporrizaje... (otras) dos hélices a la basura y un brazo del quad de aluminio todo doblado fue el saldo de la catástrofe.
The bitter part of the story starts with my last flight, which I consider probably my final flight. Now that I have a pretty stable quad, it comes to the scene the fact that I'm awful flying this damned things. I was not able to do a normal flight test and I almost lost the quad, needing to cut it off and make it fall before loosing it from sight, with the consequent hard landing, two (more) propellers broken and one aluminium arm bended...

Así pues, este post es para declarme oficialmente como un queso volando quads, y hasta que no consiga un simulador o que mi hijo sea suficientemente grande para volarlo él solito, yo no pienso volver a volar quads. Prefiero usar mi poco tiempo disponible para centrarme en los aviones que son mucho mas amigables para el piloto principiante, hacer mis primeros pasos en FPV y dedicarme a algunos proyectos que tengo en mente.
So, this post is to officily declare to the world that I suck as a quadcopter pilot, and until I get a flight simulator or my kid becomes old enough for him to flight, I won't see myself trying again. I'd rather expend my little time in the airplanes that are more flight-friendly, the FPV and my upcoming new projects.

¡Pero que mi historia no les desanime! Fabricar los quads es divertido, y quien dice, tal vez uds resultan mucho mejor piloto que yo y terminan disfrutando.
But please don't think in quitting if you are starting!... Perhaps you are better pilots than me!!


¡Buenos vuelos!
Good flights!